[adinserter block=”1″]
Aside from offering extremely powerful photo organization tools across your devices, Mylio Photos can also let you travel with your media collections securely
With travel-related photo management in mind, Mylio Photos+ offers a whole package of sync capabilities that let you travel with zero worries about saving your latest digital creations and having them on hand.
With a simple setup procedure, you can access your whole media library from anywhere in the world while also adding new images to your backed-up archives for future sync. Here’s how it all works.
Why You Need a Mylio Travel Drive
A Mylio Travel Drive is useful for many reasons if you’re going on the road regardless of how far you’re traveling.
For one thing, it lets you quickly and easily have an optimized version of your whole media library on hand for whatever might come up. This even includes having up to three months’ worth of your photos available at full resolution.
Secondly, you can use it to back up new photos you take to a secure storage device that can be connected to any tablet or computer with connectivity for quick sync to your Mylio Photos account.
Finally, you can have as many of your optimized photos as you need (depending on your drive size) on hand for any sharing, editing and print needs.
Optimized photos are compressed from the safely stored originals on your main device, but despite their light size are excellent for quick sharing, editing and even basic printing.
Basically, with your Mylio Travel Drive, you can have the best of your core Mylio Photos+ account on hand at all times, on the go and use it to keep new additions secure.
What You Need for Your Mylio Travel Drive
The most essential thing you’ll need for setting up your Mylio Travel Drive is an actual external hard drive.
These are available at all kinds of different prices and in different formats. What we most recommend though is a rugged, drop-resistant, compact drive that offers at least 2TB of internal storage.
Preferably, it should also be an SSD device, since these tend to be more resilient to impacts or falls and much faster for reading and writing (uploading and downloading) files.
Many different models of travel drives are available from a whole range of brands, so shop around for reviews of the best models as rated by other photographers. We also have some carefully rated suggestions of best drives right here too.
Depending on the kind of drive you choose and its storage capacity, you might be looking at spending anywhere from $100 to 400+ dollars on it, especially if it’s an SSD model. The investment will be well worth the money though.

If your drive is cat-resistant, it’s probably good enough…
Setting up your Mylio Travel Drive
This guide and this video series from Mylio Photos both cover the extremely specific, clear-cut details of setting up your Mylio account and your Mylio Travel Drive exactly how you’d need to for optimal security.
However, for the sake of a brief rundown (we promise that none of the steps are very technical), here’s what you’ll need to do:
The drive you want to use as your Mylio Travel Device should be formatted as an EXFAT storage medium.
The reason why is that EXFAT is the most flexible format for connecting between different device types and operating systems. It also doesn’t apply file size restrictions for uploads.
In Windows machines, you can set your external drive to EXFAT by connecting the drive and before adding any files or folders to it, right-clicking on the drive icon to select “Format”. A menu will appear with a drop-down option that lets you set its formatting to EXFAT.
If you’re using macOS:
- Open Disk Utility.
- Select the external drive you want to format on the left of the window.
- Click the Erase button.
- Select FAT32 or exFAT format from the drop-down menu.
- Click Erase and follow the remaining prompts.
Once you’ve done the above, you can simply launch Mylio Photos+ on your main computer while the external drive is connected, and under your “Dashboard” icon, select “Devices” to add the new external drive.
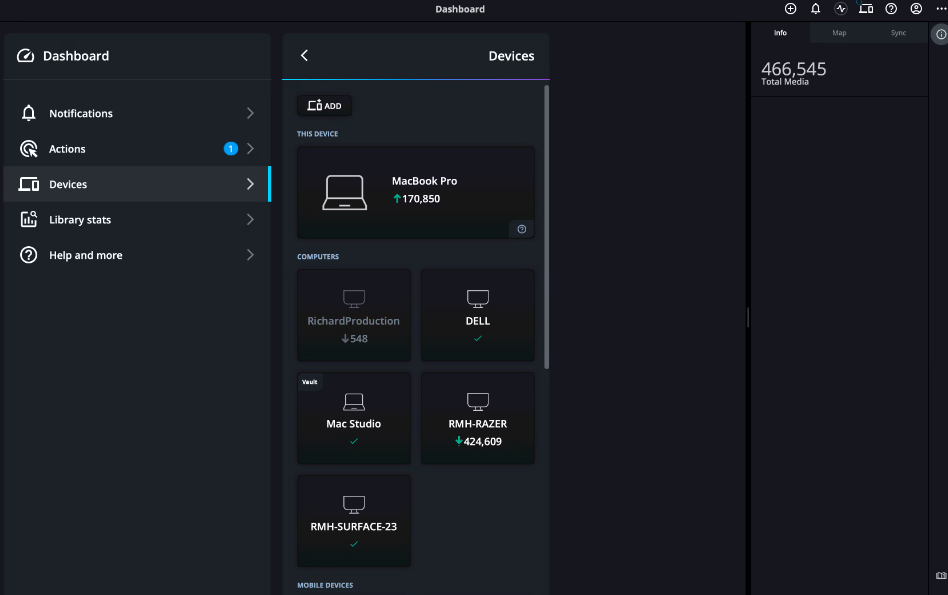
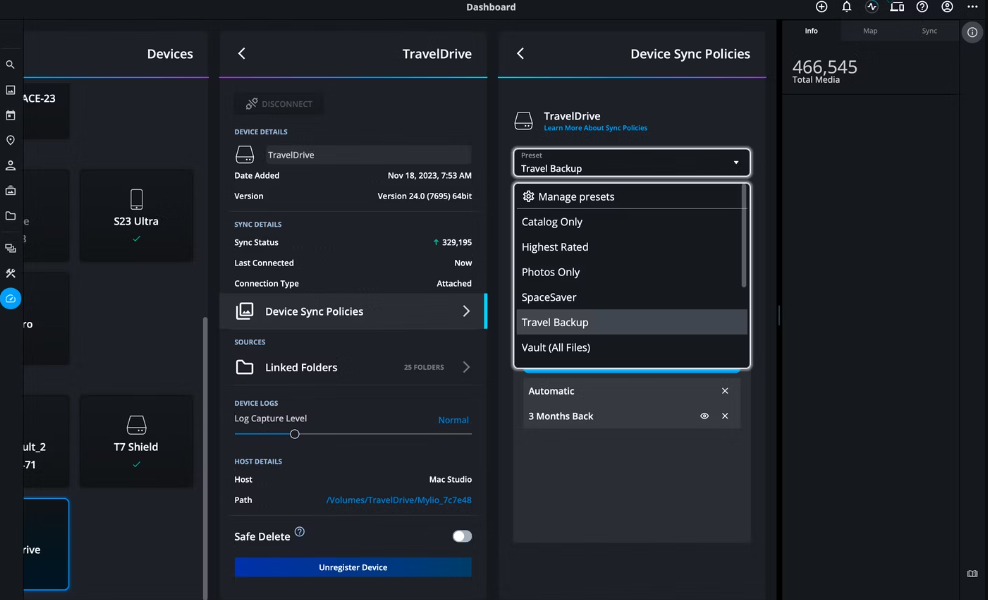
Your next step will be to set the drive up with Mylio Photos “Travel Backup” preset. This preset automatically syncs the last three months of your photos in your account with your external drive. It will also sync newly imported files while you’re traveling.
A further step you need to take is to select the “Optimized” tab under “Device Sync Policies” and in this click on “Add Quick Collections to Sync”.
In this menu, you can select all of your collections of optimized photos sent to your drive for easy access to compressed versions of the images and other media in your entire Mylio Photos Library while you’re traveling.
The guides we link to above cover several other steps you can take to set up your Mylio Travel Drive, use Mylio Photos+ sync options and use Mylio Photos while traveling.
However, the above process covers the essentials of setting up a Mylio Travel Drive.
Please remember that sync options for setting up a Mylio Travel Drive are only available with Mylio Photos+.
The free version of Mylio Photos is just as robust as the premium edition for organizing photos on a single device, but it doesn’t offer any of the sync or cross-device sharing options of the premium subscription.
Luckily though, you can try Mylio Photos+ during a free trial period and if you’re convinced of just how useful the platform is (and I honestly do love its abilities), you can switch over easily. You can also sign up for a Mylio Photos+ subscription for 25% off right now.
Exclusive Discount
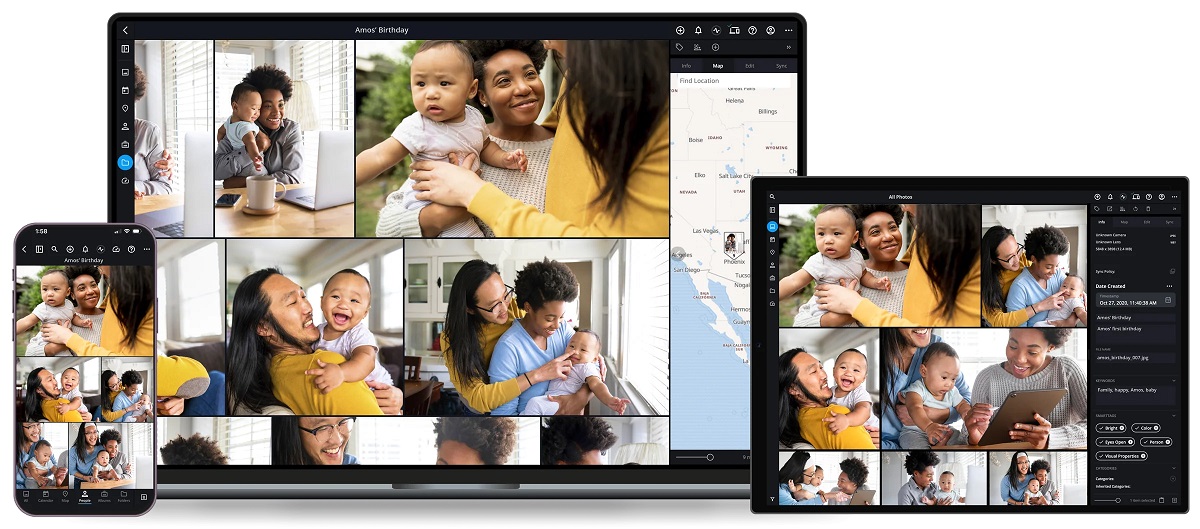
You can download Mylip Photos for free, or save 25% on a Mylio Photos+ subscription with code Shotkit25.
[adinserter block=”1″]
Credit : Source Post


